There are so many different weaving style so I figured to do a simple tutorial for some of you who are novice and for some of you who wants a quick refresher on other weaving style.
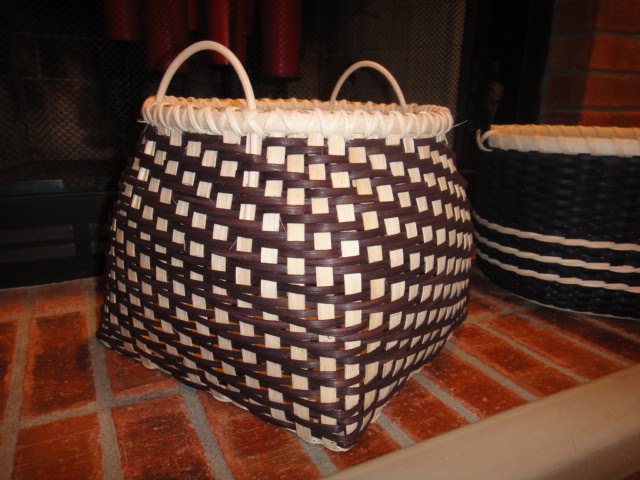
Today we are going to work on Herringbone twill weave. Its simple, but you do need to pay good attention to detail to make sure you don't skip or not skip a spoke/stake or forget to move the starting stake/spoke marker (clothes pin) as you go around. if you notice that you did make a mistake do go back, its well worth going back to fix the mistake!! But best way to avoid going back to fix your mistake is to pay attention to each round so you'll catch the mistake right away and not wait until when you are just about done.
1. Make a basket base, it can be any shape, for the tutorial I just made a small base using 14 -1/2" flat cut all at 22" made a base 6inch X 6 inch.
2. make sure to twine around once with a round reed to keep the base in place!
start with 3rd stake from the left, if you are working on the round then obviously start anywhere.
attach a clothes pin that is special from any other one and remember that its the starting stake, place a weaver behind the starting stake use clothes pins to hold in place for 3-4 rounds.
3. weave over two stake, behind two and continue this pattern over two under two all the way around until you reach one stake before the start.
4. now instead of going behind two just go behind one, move the special clothes pin one over to the left to mark it as the start of round 2 and continue over two behind two until you reach the stake/spoke next to the starting stake of that round.
so since this weaving style is continue weave, what do you do when you run out of weaver? you obviously need to add more. you can add it how ever you like it but this is how I do it and it may not be the way you do do it but this is my way.
cut the reed at the end of over two
scarf off the rounded area from behind two all the way to the end (if you are using flat oval)

really bad picture but place a new weaver over the scarfed reed and continue on.
 |
| Starting Stake |
 |
| Over Two |
 |
| under two |
 |
| all the way around until you reach the height you desired. |
|
|
 |
to end the weave, simply end behind the very first starting stake. leave couple of inches of weaver to tuck the end.
Pack down evenly !!
my advise for you if you are using dyed reed, make sure you have extra dyed reed sometimes you'll need more then you expect due to breakage and miscalculation. You don't want to try to dye reeds and end up with it being off color. make sure your reeds are thick and strong! don't use the think weak reeds to weave. |
|
|
|
now you need to figure out what kind of rim you want to do. if you want to do traditional rim, you need to do a rim row, a size smaller then the rim you want to put on cut and tuck and put on a rim.
if you want to do a braid rim, then you need to twine at least twice with no2 or no3 round reed and then tuck all stake/spokes and braid your favorite rim.
I did a traditional rim with flat oval on the outside and flat flat on the inside why? we'll you'll need to come back again next week to see why!

 here are the mold I found on Amazon.com. I used candy melts to make the lego blocks and used rolled and colored fondant to make the lego guys, much easier and faster to use the fondant then the chocolate since you need to wait for the candy melt to set before removing them from the mold VS mold and remove the fondant


